I've been using mITX for years, and up until a couple of years ago, I stuck with some fairly small cases. However, the recent shift in GPU sizes, from being merely large to being behemoths, meant I thought I'd need to go with a larger case. I settled on my new hardware specs and found a single case on the market that the GPU would fit in: the ASUS ROG Z11. I wasn't a fan of the glass, but it seemed acceptable on paper (and in pictures), there were no reviews at the time, so I just went for it.
In reality, it turned out to be one of the worst cases I've ever owned. It was heavy, annoying to build in, and required partial disassembly to plug cables into the IO shield. I ended up using small extension cables to save doing this, which added weight, created mess, and tended to fall out when travelling to LANs. To top it off, I had to use a Dremel to make the GPU fit, even though it was on the supported list. After lugging the behemoth upstairs after a LAN, I reached my limit. I wasn't even going to finish setting it back up. I took some inspiration from Bender.

v1
The first case was very much a learning experience. I went with 2020 extrusion as it seemed like a flexible material you could build anything out of. It did meet all the requirements I started out with, but it ended up still being a tank, almost as heavy as the ROG case, although significantly less frustrating and way cooler. It definitely reflected me.
Because I wasn't entirely satisfied with it, and thanks to the flexibility of the extrusion, it was in constant evolution. I initially attached components directly to the extrusion with various brackets but eventually put a piece of MDF in the slots of the extrusion and attached everything to that. This was a much better idea, but it did increase both the size and weight. It eventually became a bit of a Frankenstein's monster with all the additions: wheels that vibrated the case apart (literally after one LAN), a carrying handle, a height-adjustable monitor stand, and a controller storage hook.
One of the better ideas was a custom surge protector. Reflecting on an incident at a LAN where a row of people got their PCs fried from a faulty electrical distribution board, a friend went down a rabbit hole investigating surge protectors. I, however, carried on down the rabbit hole and built my own surge protector into the case, which also provided a spare power output for the monitor.
v2
I had been thinking about v2 for a while. Unlike my first attempt, which involved some "measure once, cut three times" improvisation, this build was entirely modeled in CAD first.
In retrospect, this approach probably directly relates to me having aphantasia. It's very hard to design a physical thing when your concepts are abstract and hard to visualise. After getting a 3D printer, I became proficient at CAD, using it to overcome the limitations of not being able to visualise things. If I can't rotate it in my head, I certainly can once it's a virtual thing on screen.
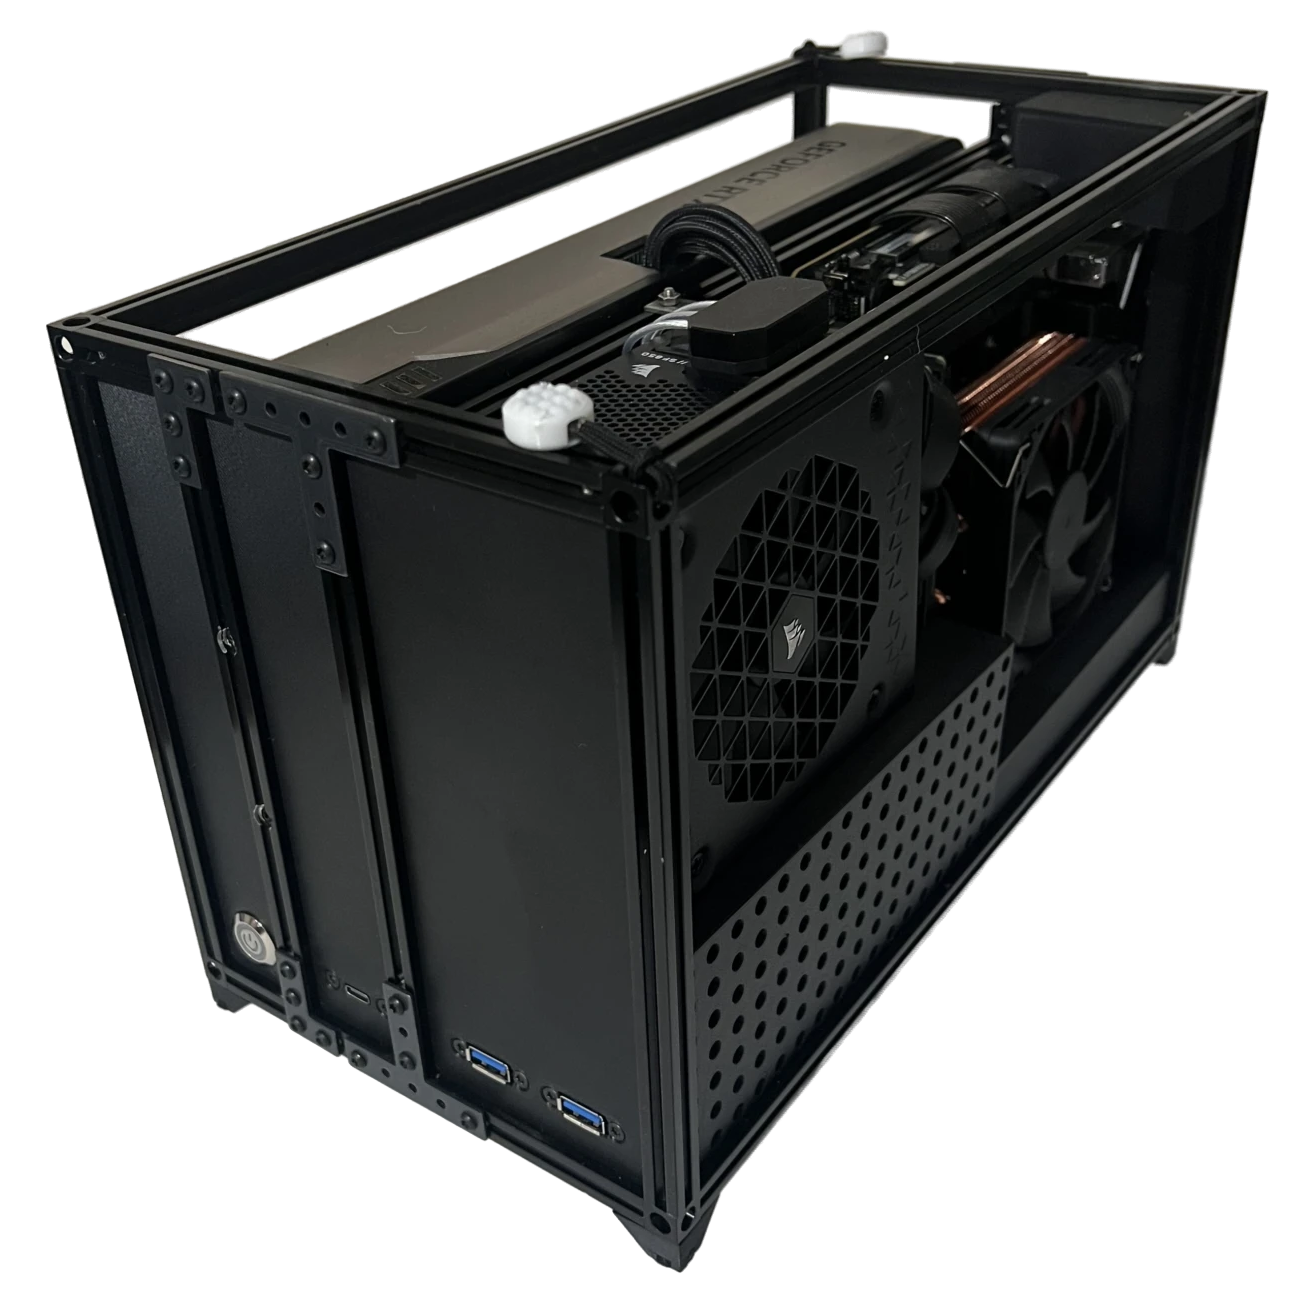
After v1, I decided that 2020 extrusion was also just too big and I wanted to go back to an SFF case. I had looked at MakerBeam when doing v1 but dismissed it as too weak; however, I did some research and found a healthy community of people using it. It offered the industrial aesthetic I liked of the extrusion but at 1/4 of the size and weight of the 2020 extrusion.
I created basic CAD proxies of my components to work out the layout and airflow (sadly I deleted these early drafts). Once the layout was settled, I started to design a frame that would support the components in these positions.
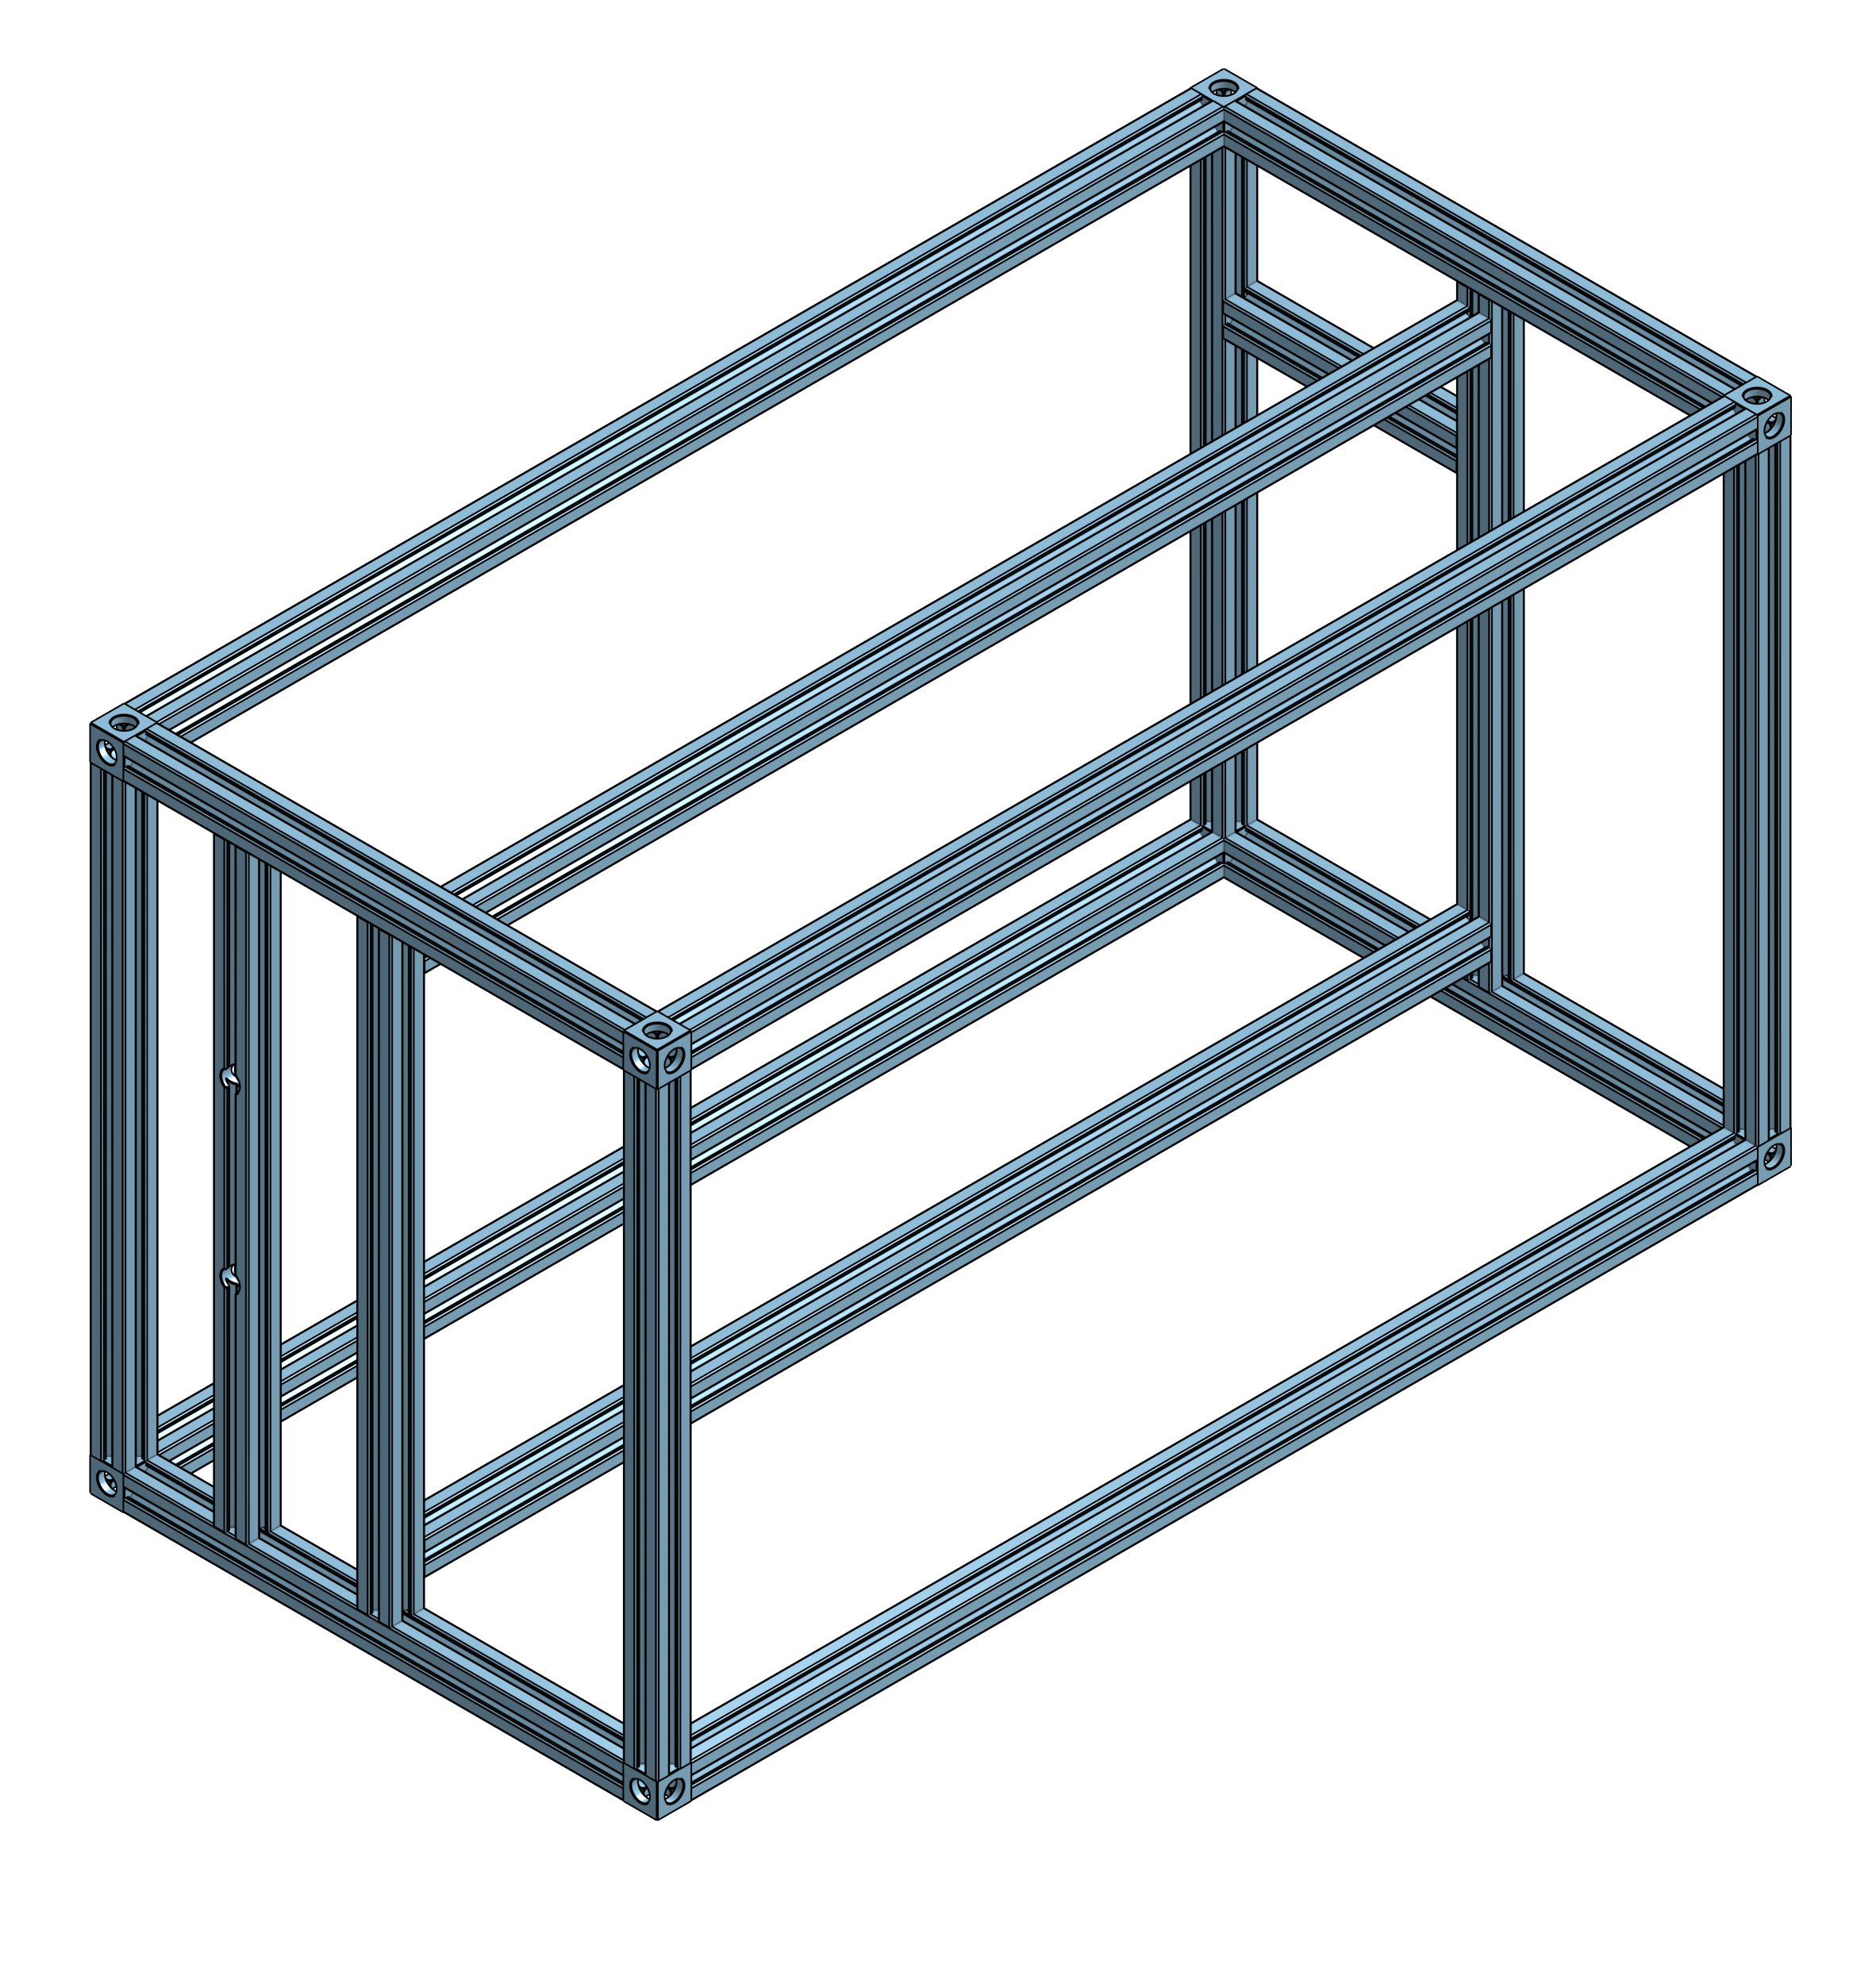
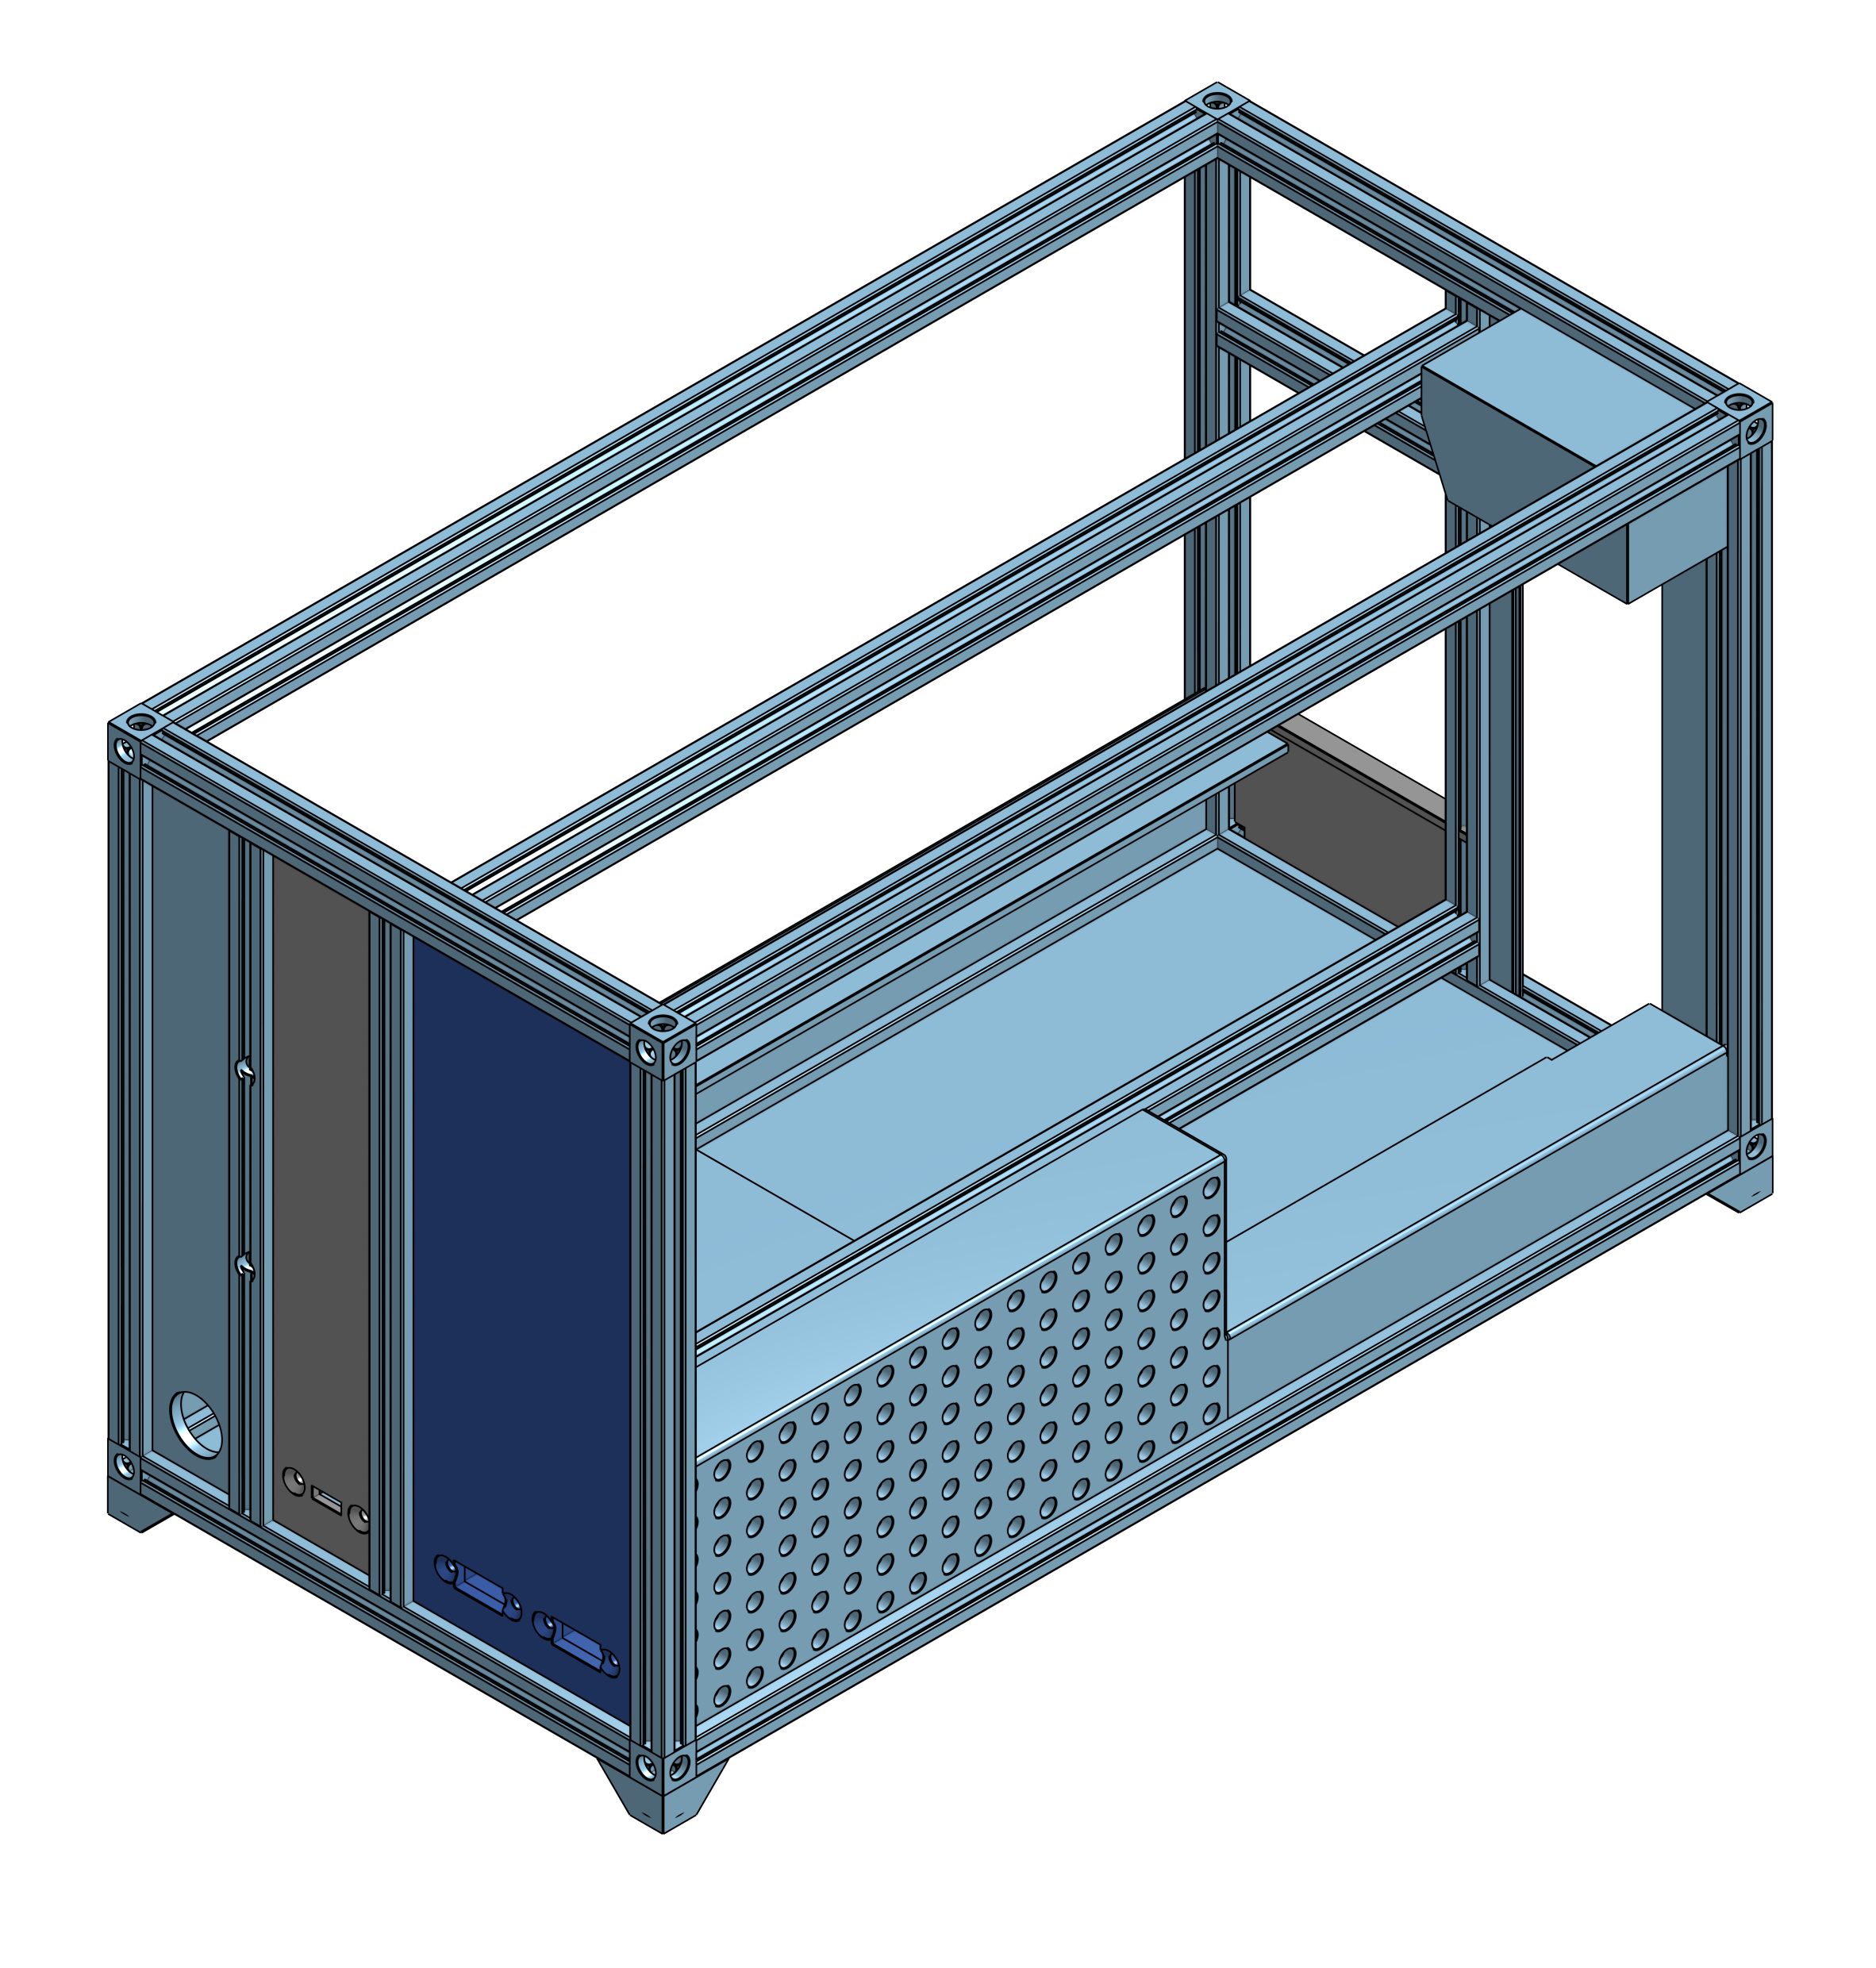
I bought and assembled the MakerBeam as in the render and everything worked wonderfully. It didn't, however, feel finished. Much like v1, it needed to have some panels, a power button, and somewhere to hide the cables, so I designed some supports for the PDU inlet, some front panels, some shrouds, and some feet.
The printed parts are PETG. This was based on temp measurements around 50-60°C on v1 and the direction of airflow from the planning, so I decided this was probably a safe choice. I am, however, worried about creep in the summer, so I'm keeping an eye on it - it might need reprinting in ASA.
After I reached this point, I decided I did actually value the custom surge protector from v1 and decided to add this in. In theory, there was room in the CAD model; in reality, with all the cables, this was an exercise in frustration. It's in and done, but it's reminded me I need to think about theoretical clearance vs. actual clearance.
I also decided to add a detachable webbing strap for carrying. Whilst the case is small, I still need hands to carry a monitor, a bag, and open doors! It's detachable so it doesn't get in the way when not in use. It's a combination of printed parts, glue, and paracord, which then connect to the webbing to create a handle. It's still a little bit of a worry having the weight supported by 3D printed parts, but I've done some tests over a soft surface and it seems safe... time will tell.
Finished result (for now)
The final dimensions are a compact 340mm x 200mm x 170mm, bringing the total volume down to around 11.5 litres. Compared to the ROG case, v1, and many commercial SFF cases, this is tiny. It fits a triple-slot, full-length GPU, an 850W SFX PSU, and a gaming CPU in a small space. I did have to compromise on air cooling, but so far these have not caused any real issues. At full load (CPU and GPU), the GPU and CPU temps don't seem to creep above 60°C.